
Our student coder Julian prototyped a feature that has been on our wishlist for some time now. Below is his guide to adding animated portraits in Unity.
I will take you guys through a short, technical overview of the process so far to create animated character portraits. The result shown below is an animated portrait of the currently selected agent which is displayed in the bottom right corner.

My first idea was adding a camera to a fixed transform that moves with the character itself and renders to a texture. This allows the player to see the agent in its current animation state, which seemed cool at first.
After giving it a second thought it probably would not be very desirable in situations where the agent is swimming. The angle would feel weird if the player is swimming on a vertical plane while the camera was meant for an agent standing up.
The second idea I had turned out to be the idea I used for the current implementation. Making a copy from the agent and rendering that to a texture.
Copying the agent has a few advantages over the previous approach. For example the animator can be controlled independently from what the actual agent is doing in the game. Another example is the lighting, this can be adapted to the needs of a portrait instead of the scene lighting that looks quite arbitrary when displayed in a portrait.
The code
Step 1
Check if the agent is already duplicated. If it isn’t, create a copy and move it under the scene where the lighting for the portraits is set. If a copy already exists, simply enable it.

Step 2
Update the copy’s animator to be idle so the portrait always shows an idle (or custom in the future) animation.
The setup
Step 1
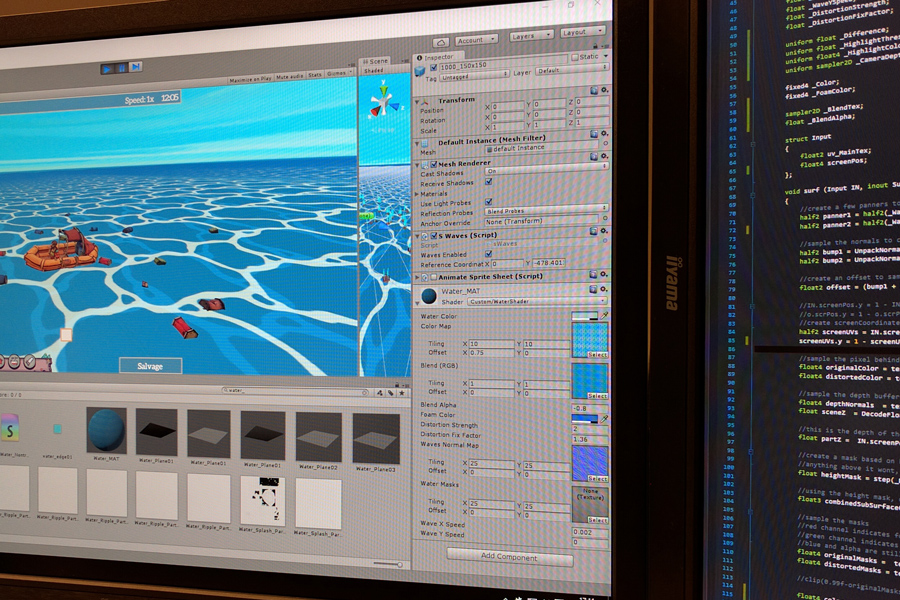
Make a dedicated spot in the scene for rendering the portraits. This is done at -1000 y in our case. This is isolated enough from the rest of the game. Place your camera here and a transform that determines the position where the generated character is posed to get some good shots.
Step 2
Have the camera for the portraits render to a texture by setting a RenderTexture in the camera settings (see gif below.)
Step 3
Display that texture on your canvas. This can be done using a Raw Image.
Step 4
Set the camera settings for the desired effect! I only want the agents to be drawn so I set the culling for the camera to only display that layer. I also want it transparant so the background from our camera setup is not drawn over the screen. Unity makes this really simple to achieve by just setting the clear flag to solid color.
All done! This is not the finished in-game version yet. This will be combined with some custom UI like the one in the header to make everything blend together nicely.
Julian thought you would appreciate a technical breakdown from time to time, let him know here what you think!


Just going to drop this here i love simulation games! Graveyard Keeper/ Kynseed/ Moonlighter are all having some sort of life simulation and shop management in the game, so I hope to see some cool stuff like they have in this game! In particular kynseed has a really innovative aging system, everyone in the world lives, has kids, remembers what you do..things like that so i hope to see the world in this game evolve overtime as well as the NPCs. :3
Kynseed looks cool! Thanks for bringing that to our attention.
非常令人期待的游戏,希望发售时有简体中文!~
我们正在考虑!