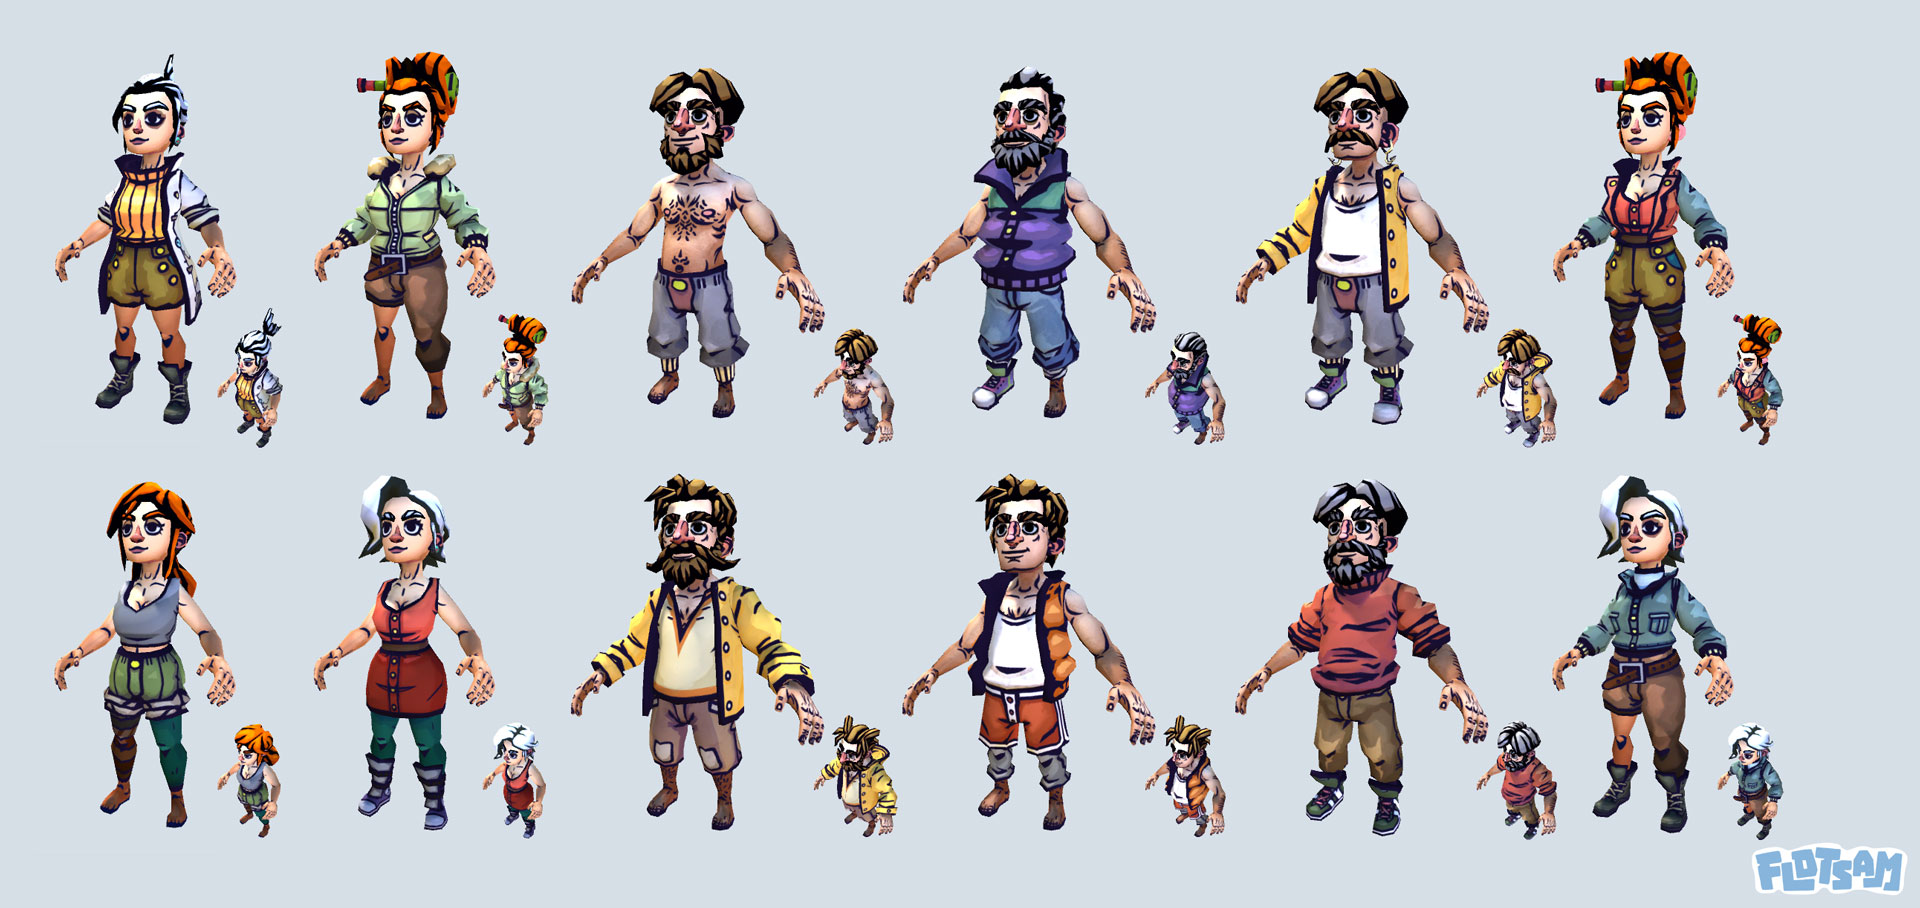
As an intern at Pajama Llama, I’ve had the pleasure of being tasked with creating a system for the artists to create characters in Flotsam. Juda-Ben and Stan needed a way to preview and generate different people quickly, by combining the multitude of body parts and clothing items they modeled. There are over 85 clothing pieces and 50 body parts spanning over both genders.
The most important part was to give the artists complete control over how the characters look, which translated into a lot of drop-down menus and toggles.
Features
The characters are split up in several required body pieces: base body, hands, feet, head, eyes, mouth, nose, ears. The rest are non-required appendages, such as hair and clothes.
The clothes were definitely the most difficult to get right in terms of probability distribution, as the artists wanted to reduce the chance of characters being generated with non-matching shoes for example. This changed the requirement on the code side from two lists of objects (individual shoes), to one list of object pairs (shoe pairs). There are other items that are designed to go together, like certain sleeves and chest pieces. These can be manually mixed and matched to give a more granular control over the final look (for example using the sleeves of an overcoat with a simple tank-top).
To create further variation, I created a dyeing system as well: a global list of dyes can be defined, and then applied to the clothing pieces using a ShaderForge material. From this list of dyes, colours can also be flagged to not be used for certain items. So for example purple can be excluded from ever appearing on shoes.
Since the characters are rigged, all the limbs have bones that need to be taken into account so the clothes move along with the character. This also means the artists can actually preview their animations in-engine, using this tool instead of external software like Blender.
So the tool serves a twofold purpose: a testing tool for the artists and a character generator to be used in code by programmers!
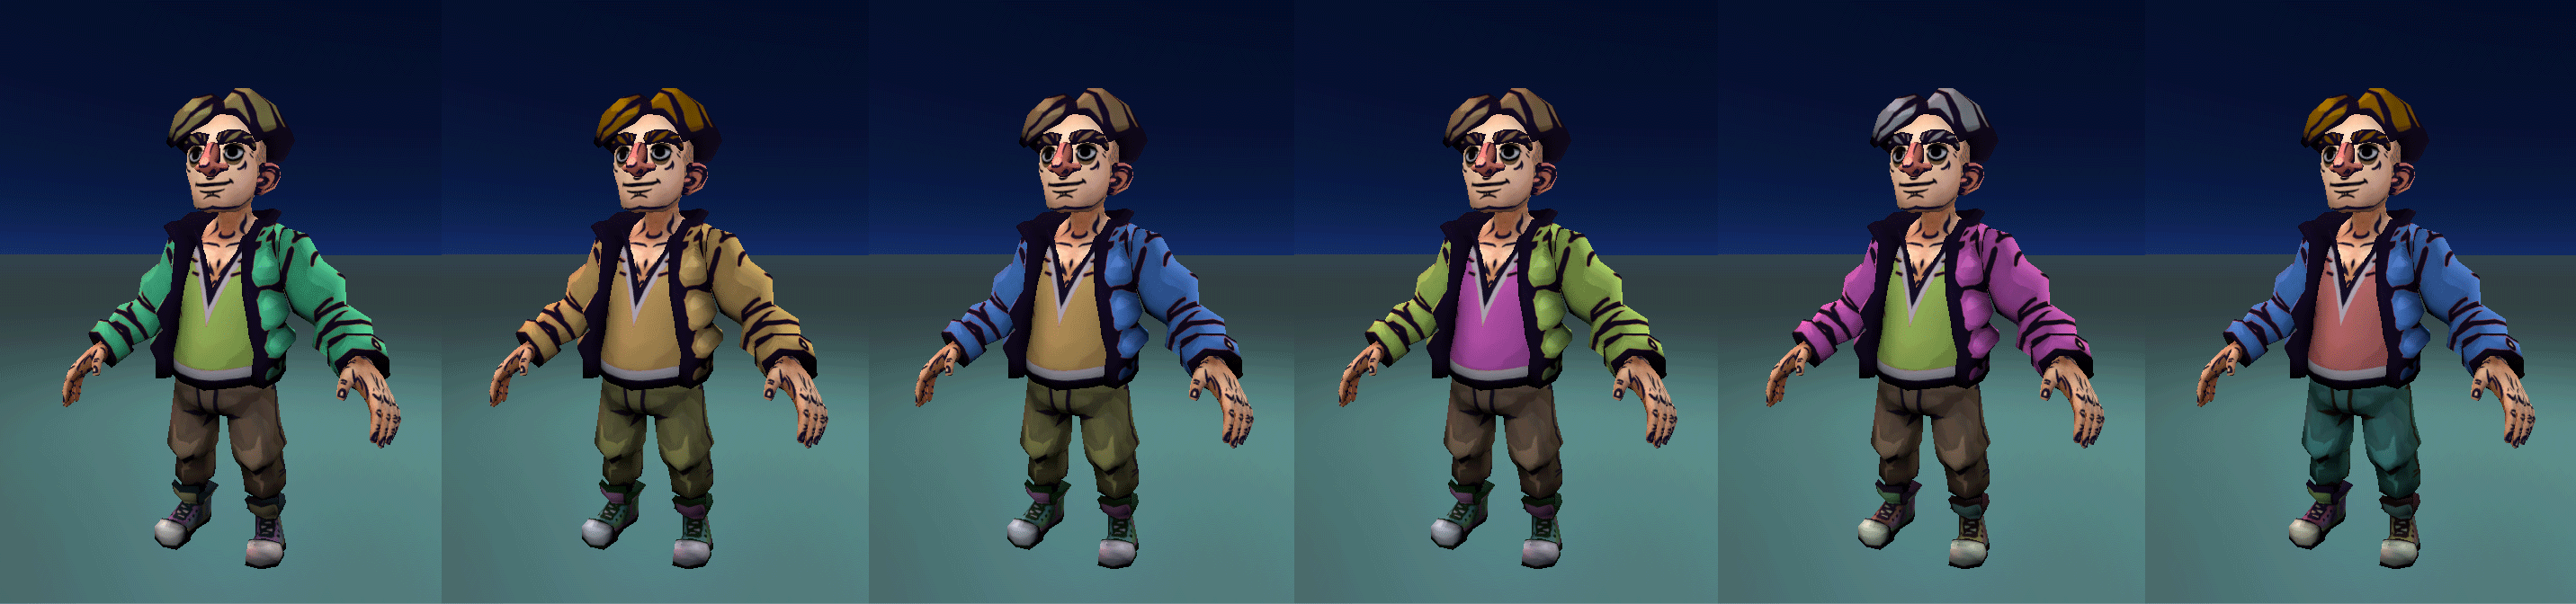
A few colour variations of the same outfit.
Technical implementation
Body parts and clothing pieces are normally stored as lists of individual objects, with the exception of items that go together. Things like pairs of shoes and cool outfits, have a separate piece of code to make sure they stay together. Character parts are divided into Body and Clothes. While this division makes sense semantically, it also allows for the artists to define a range of looks for different archetypes, like drifter or trader, and generate people using only those ranges of items. The separate body selection of objects also allows them to increase diversity by creating characters of different ethnicities, and with different facial features.
I added a randomize button as well, the constraints of which can be arbitrarily defined and tweaked. An example of this is the possibility to set the chance of women wearing stockings when they’re also wearing shorts. These rules can of course be ignored and characters can be manually created, so I’d say control is entirely in the hands of the artists.

The data structure for saving characters. (excluding dyes)
All these options are visualised to the artists using Unity’s custom inspector system. The features are divided into: character generation, setting the object lists, tweaking the rules and percentages, and finally animations testing, which scans the selected character animator for all available animations per layer.
While the artists are creating a character, all their selected options are saved to a CharacterLooks file, that holds the indexes and the ranges of items to be picked from.
This CharacterLooks file can be saved to a presets folder, making it possible to continue working it later or to be used when generating a character from the code.
The result
After 4 weeks of working on this not only have I created a useful tool that will speed up the creation of vastly diverse characters for Flotsam, but I’ve also learned a ton about Unity.
I had never heard of ScriptableObjects, and how powerful they are for saving settings before, and I’ve already starting using them in personal projects. Animations in Unity were something I had experimented with in school, but beyond that I had no idea how the bones/avatar system worked in Unity. Now I’ve had to get down and dirty with bones being transferred from one Animator to another, which makes me feel much more confident about dealing with Animations in the future.
For my graduation project I had worked with the inspector to make a Unity tool, but not on a project of this scale. I discovered a ton of functions that make the inspector so much more usable. (Did you know there’s a EditorGUILayout next to the GUILayout? I didn’t!) I also learned some hacks, such as using a box with height 1 and auto-width to create a nice divider line.

The character generator, with the different tabs shown next to each other.
Be sure to keep an eye on the Tigsource Devlog for frequent updates and if you have any questions, don’t hesitate to ask them!


Let’s get some diversity goin in these characters!
That’s definitely planned!
Don’t worry too much about diversity just worry about the game and gameplay. Can’t wait looks amazing!